
Chapter VI. Holistic Strategies for Common Health Challenges; Restoring Wellness & Vitality
How Your Food is Grown or Raised May Be Even More Important Than What You Eat:
As Dr. Zach Bush discusses on the Rich Roll Podcast (2018), the causes of gut-health complications so many of us face may not actually lie in the kale, beans, potatoes, or even white flour themselves (foods often blamed for their reactive nature), but rather in the toxic chemicals used during their production and harvesting. These chemicals, particularly glyphosate (commonly known as Roundup), are likely contributing to a wide range of health issues, including bloating, diarrhoea, stomach discomfort, both underactive and overactive immune responses, chronic diseases, cancer, and the rapid decline in fertility rates. To effectively address gut health challenges at their root cause, this connection cannot continue to be overlooked.
For anyone who is conscious of their health, and the well-being of their family, community, and the planet—I highly recommend researching the impact of glyphosate and other widely-used agricultural chemicals on the declining health of our global population. The insights I’ve gained and applied from exploring this enlightening (albeit disturbing) topic have been nothing short of transformative. They’ve played a pivotal role in reversing conditions that were previously stubborn and unrelenting.
Dr. Zach Bush, in particular, stands out for his profound and comprehensive research on the connection between chemical agriculture, gut health, and the growing epidemics of chronic disease, autoimmune disorders, and fertility decline. His work is not only insightful and thought-provoking, but also incredibly inspiring. He doesn’t just acknowledge the challenges we face—he actively works to create innovative, sustainable solutions.
I highly recommend exploring his lectures, podcasts, products, and initiatives. They reflect his deep commitment to quality, integrity, and immense societal value. For anyone interested in learning more about the undeniable link between conventional agriculture, gut health, and the global health crises we are currently facing as a species, I urge you to check out his website at https://zachbushmd.com, or one of his many published articles here https://zachbushmd.com/wp-content/uploads/2017/04/Glyphosate-Article-for-Holistic-Primary-Care-3-21-16.pdf .
Video credit: Roll, R. [@TheRichRollPodcast]. (2018, March 12). GMOs, glyphosate & gut health [Video]. YouTube. https://www.youtube.com/watch?v=jWgnkgYtqnw
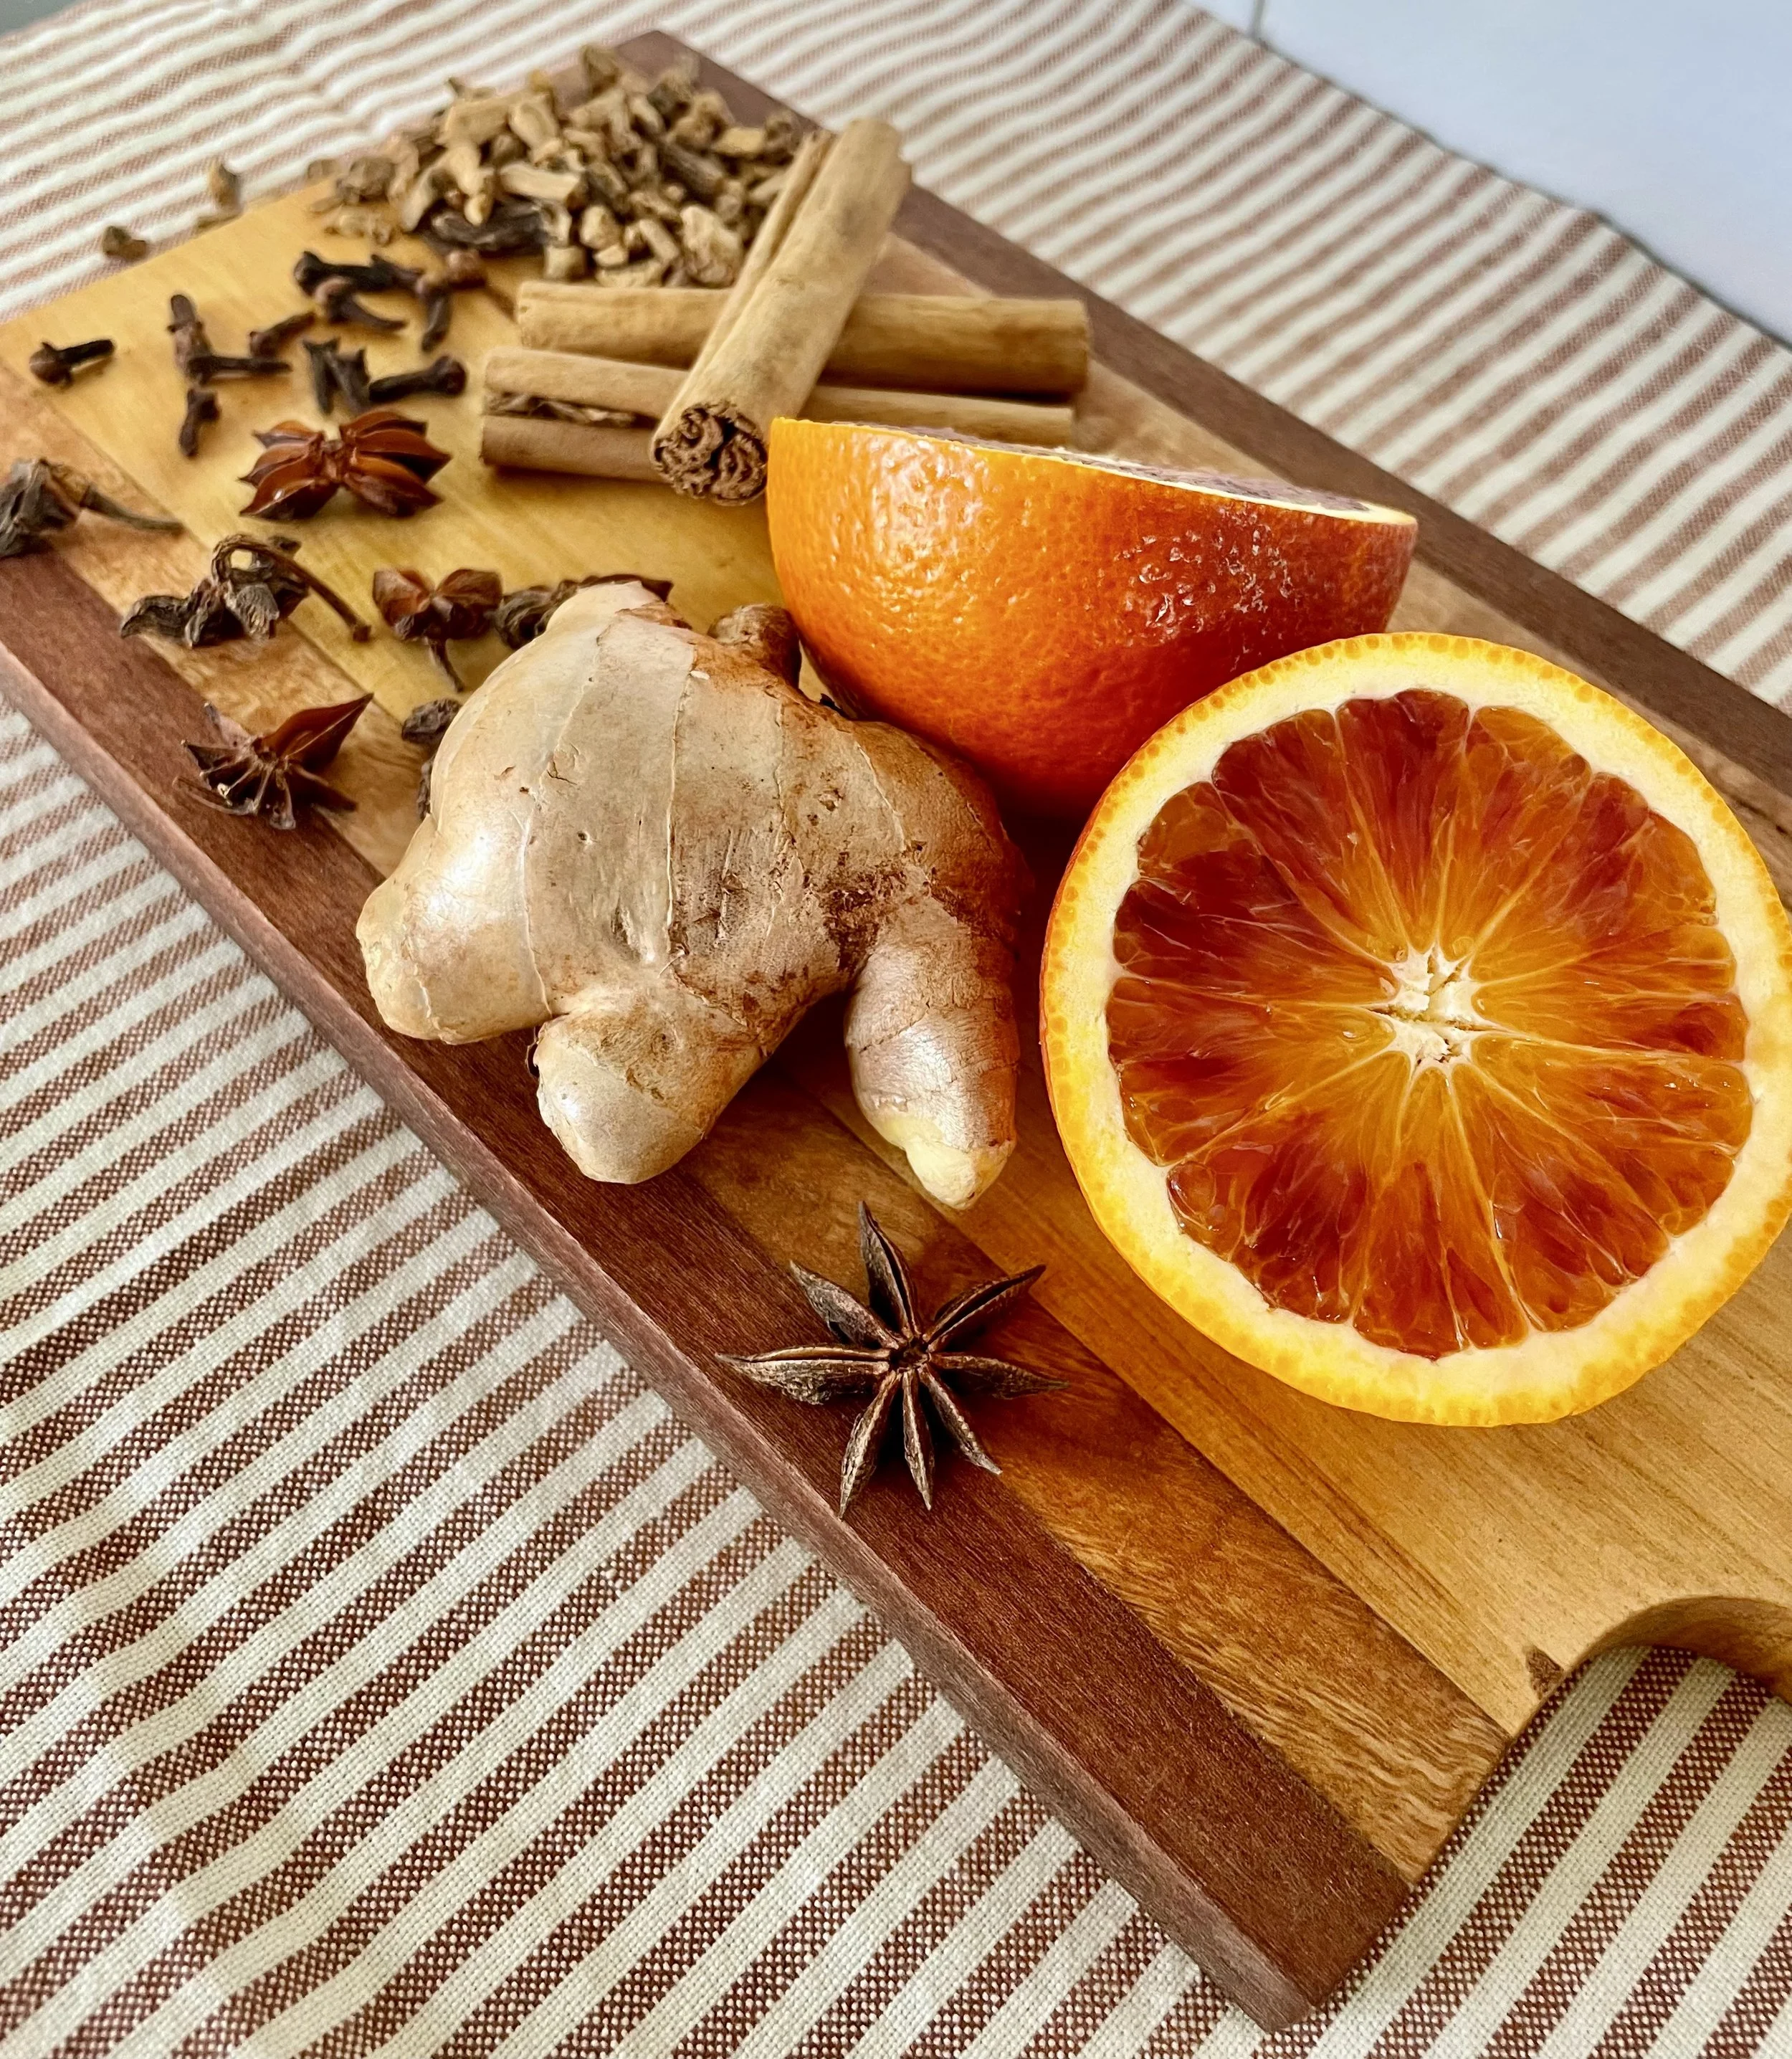
Blood Orange & Spice
Digestive Bitter Apéritif
Ingredients:
•15g Gentian root (Gentiana lutea)— dried, in small pieces
•5g Cinnamon bark quills (Cinnamomum zeylanicum)— dried and broken into small pieces
•5g Ginger root (Zingiber officinale)— fresh or dried / grated or powdered
•2g Cloves whole buds (Syzygium aromaticum)— dried and powdered
•2 g Star Anise whole pods (Illicium verum)— dried and powdered
•10g fresh organic Blood Orange peel— finely grated + juice of entire orange
•120 mL 40% ABV organic Brandy
Equipment:
•Glass jar with a tight-sealing lid (approximately 200 mL capacity)
•Fine mesh strainer or cheesecloth
•Accurate kitchen scale
•120mL amber glass dropper bottle (for storage and dispensing)
•Blank labels
Method:
1. Preparation:
Make sure all herbs are dried and properly prepared (chopped, grated, ground, and juiced) for optimal extraction.
2. Combine Ingredients:
In your sterilised glass jar, combine all herbs, spices, as well as Blood Orange peel and juice.
3. Add Brandy:
Pour 120 mL of at least 40% alcohol by volume (ABV) Brandy over the herbs, adding extra if needed to ensure all ingredients are fully submerged.
4. Seal & Label:
Seal the jar tightly and give it a good shake to mix the ingredients. Label your jar with all ingredients and the date you made it on.
5. Infusion Process (Folk Method):
Store the jar in a cool, dark, and dry place for about 4-6 weeks. Shake the jar vigorously every few days to help extract the flavours and medicinal properties from the herbs.
6. Strain the Mixture:
After the infusion period, strain the mixture using a fine mesh strainer or cheesecloth into a clean, sterilised container. Discard the spent herbs into your compost.
7. Bottle Your Tincture:
Transfer the strained tincture into a sterilised glass dropper bottle for easy dosing and storage. Label your Bitter Digestive Apéritif Tincture with its name, ingredients, and the date it was made on.
8. Storage:
Store the tincture in a cool, dry, dark place. The alcohol content will help to preserve it for many months, or up to 2 years if stored correctly.
To Use:
Your spiced herbal digestive bitters can be used in various ways, including by adding 10-15 drops to a cocktail before a big meal, or by taking 1-3 drops directly on the tongue before meals to improve digestion and assimilation of nutrients.
Probiotic Water Kefir Recipe
Ingredients for Rehydrating Kefir Grains:
•50g dehydrated water kefir grains
•1 Litre of Water (preferably spring water, or filtered, non-chlorinated water)
•1/4 Cup raw, organic cane sugar
Ingredients for 1st & 2nd Fermentation:
•~1/2 Cup live water kefir grains
•1/2 Cup organic Raw Sugar
•2-3 slices of organic Lemon (with peel on)
•Few slices of organic Ginger (peeled)
•Small amount of sulphite-free organic dried fruit (a few Raisins or Currants,
a Date, an Apricot, or a Fig, etc.)
•¼- ½ teaspoon organic Blackstrap Molasses
•Any kind of fruit, herbs, or spices you would like to flavour your kefir with
Equipment:
•2 x 2L wide-mouth Glass jars, with lids
•Silicone or wooden spoon (avoid metal)
•Plastic fine mesh sieve (avoid metal)
•Rubber band or piece of string
•Piece of cheesecloth or muslin
•Bottles for storage of final fermentation (I like to sterilise and repurpose old wine bottles with screw-tops)
Method:
Waking Up Your Grains:
Firstly, if you have purchased dehydrated water kefir grains, you will need to wake them up. To do this, begin by sterilizing a 2L glass Jar using boiling water. Then, place 50g of dehydrated kefir grains into your jar, along with ¼ Cup of organic raw sugar and 3-4 Cups of pure water. Stir gently, to dissolve the sugar in the water and to agitate the grains a little bit, beginning to wake them up. Place a piece of muslin cloth over your jar, and secure with a rubber band or piece of string and leave on your bench for 3 days- 1 week (depending on the ambient room temperature). The kefir grains will rehydrate and become plump and squishy when they are ready to use.
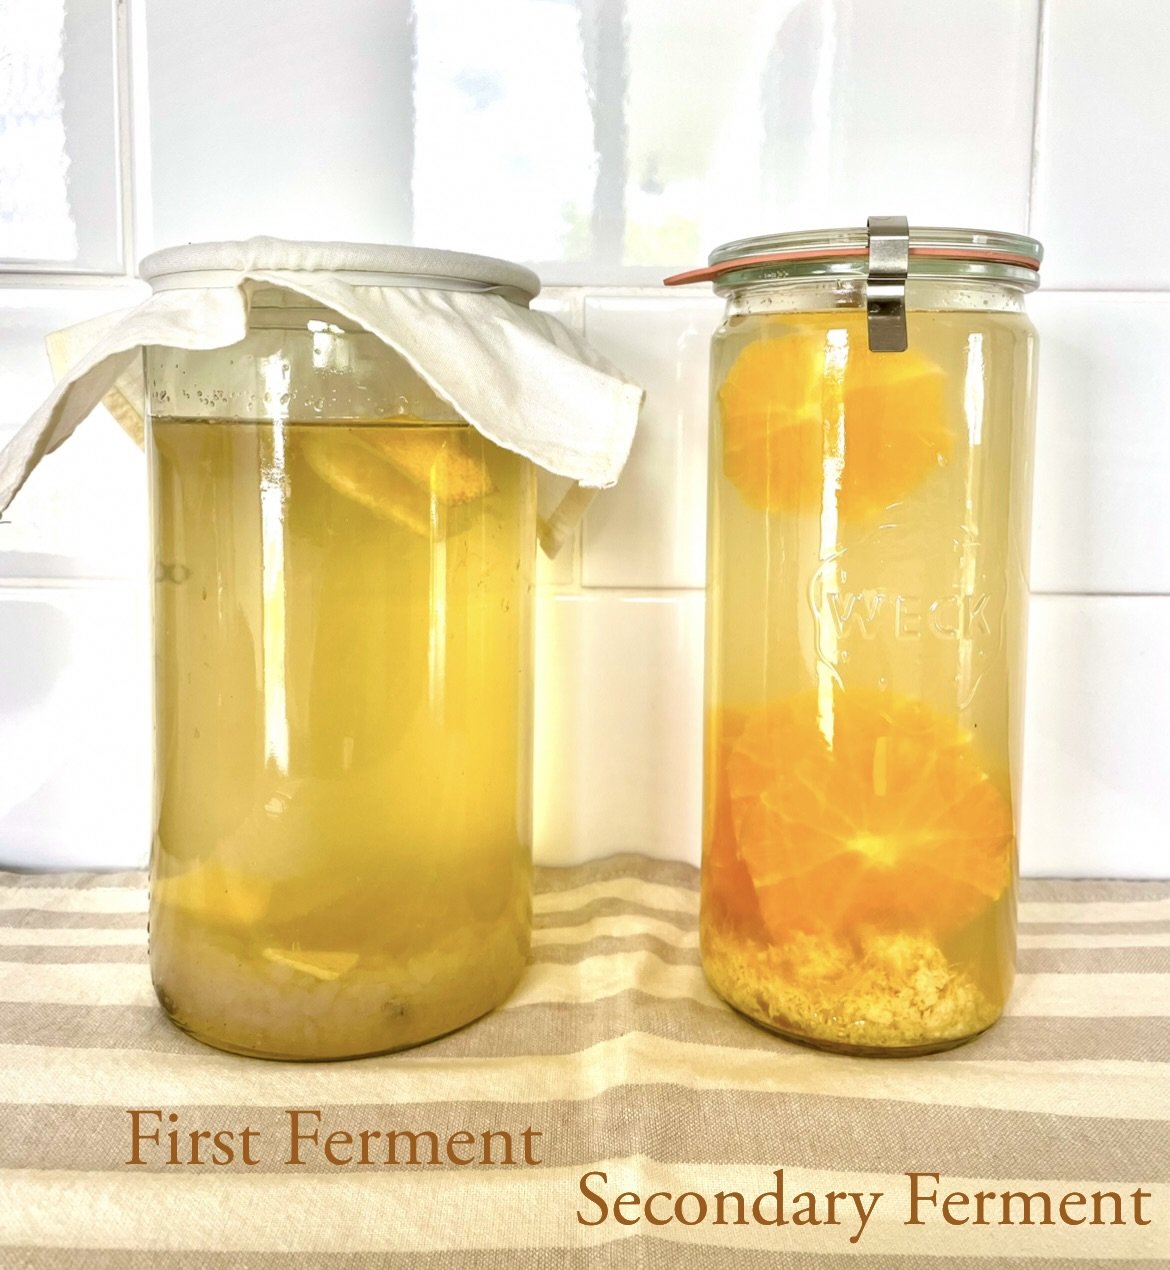
First Fermentation:
To begin brewing with your rehydrated grains (you should have approximately ½ Cup of live water kefir grains now), place ½ C sugar into one of your sterilized jars, filling it with pure water about ¾ full. Stir to dissolve some of the sugar, then add in your ½ Cup kefir grains. Sir in your Molasses, Ginger, piece of dried fruit, and Lemon slices. Place your muslin cloth over the top, and secure with a rubber band or piece of string. Leave your jar at room temperature for around 48 hours (keeping in mind that fermentation speeds up in hot weather and slows down in cool weather, so fermentation times will vary).
Second Fermentation:
After a couple of days, when the lemon, ginger, and dried fruit have floated to the top— it is time to strain the liquid off into a second 2L jar, discarding the spent dried fruit, and setting aside the kefir grains to begin a new batch of kefir with (simply follow the steps for ‘First Fermentation’ all over again, placing the rinsed kefir grains back into fresh sugar water and repeating the process, or storing any extra grains in sugar water in the fridge if you don’t plan to use them again immediately).
Into the jar with the strained liquid, you can now add any fresh fruit, herbs, or spices you desire. Some of my favourite combinations have been blood orange, ginger, and echinacea root; organic strawberry and kiwi; mixed berry with lemon; and rose hips, rose petals and vanilla bean. The possibilities are literally endless, and it can be so gratifying to get creative with this part, and to use locally sourced, grown, or foraged botanicals. A good rule of thumb is to include at least 1 fruit with a higher sugar content, as it is the sugar in the fruit that feeds the bacteria and yeasts, and therefore causes fermentation and carbonation, making a beautifully effervescent drink. Seal your jar tightly for the second fermentation and allow it to ferment on your bench for another 24 hours. During this time you will need to ‘burp’ the jar every so often to make sure too much pressure doesn’t build up. At this point, sample for carbonation and sweetness— if it is still very sweet and lacks carbonation, replace your lid and allow it to ferment for another day. When it has reached your desired level of sweetness and fizziness, strain out the fruit and botanicals, and place in sterilised storage bottles (I like to repurpose old wine bottles with screw caps), before storing in the fridge to slow down fermentation. Check your finished bottles every so often to ensure the pressure doesn’t build up and cause them to explode. Make sure to label your bottles with all ingredients and the date it was made on. Enjoy your delicious and refreshing probiotic drink any time of the day or year.
Notes:
•Water Quality: Avoid using chlorinated water as it can harm or even kill your kefir grains (…and it doesn’t do your body any favours either).
•Sugar Variations: You can experiment with different organic sugars including coconut blossom nectar, raw honey, or maple syrup— but avoid artificial sweeteners.
•Alcohol Content: Throughout the fermentation process alcohol is produced, and depending on fermentation time and the sweetness of fruit used to flavour your kefir—alcohol levels can reach up to 1-3% ABV, so please keep this in mind if you do not want to consume alcohol, are currently pregnant, or if you want to offer this drink to children (you can dilute it with water or just reduce the fermentation time).
Gut-Healing Authentic Korean Kimchi Recipe
Ingredients:
Vegetables
•1 large organic Napa cabbage (around 6 pounds)
•½ Cup sea salt (For salting the cabbage)
•4-6 organic spring onions (chopped)
•1 large organic carrot (julienned)
•1 organic daikon radish (julienned)
Glutinous Rice Porridge
•2 Cups pure spring water or filtered water
•2 Tablespoons sweet rice flour (aka glutinous rice flour)
•2 Tablespoons sugar (preferably organic raw sugar, coconut sugar, or honey)
Spice Paste
•3 Tablespoons Garlic (about 12 cloves, finely minced)
•1 Tablespoon fresh Ginger (grated)
•1 medium onion (minced)
•3 Tablespoons Gochugaru (Korean red pepper flakes, adjust to taste)
•2 Tablespoons fish sauce
•1 teaspoon organic soy sauce
•2 Tablespoons sesame seeds (toasted)
Equipment:
•2 large mixing bowls
•1 large basin
•Whisk or wooden spoon
•Large 2 Litre glass Jar or fermentation vessel / crock
•Piece of muslin cloth
•Rubber band or piece of string
Method:
Slice the Napa cabbage in half lengthwise, leaving the core intact. Run the leaves under cool water to moisten them, then place in a large basin and sprinkle sea salt liberally in between each layer of cabbage. Allow the cabbage halves to rest for 2 hours, turning them over occasionally, coating them in the salt brine that collects at the bottom of the basin, until the cabbage becomes wilted and pliable. Once this has been achieved, wash the cabbage leaves well under cool running water to rinse off the salt, as well as any remaining soil or debris. Cut the halves into quarters, removing the cores, and then give them a final good rinse before placing into a strainer over the sink to allow any water to drain off.
Whilst waiting for the salt to wilt the cabbage, you can prepare the glutinous rice porridge, which will be the base of the spice paste. To do so, combine the water and sweet glutinous rice four in a small pot. Place over medium heat and allow it to come to a gentle boil, while stirring regularly— this should take around 10 minutes. Add in the sugar at the end, and allow it to cook for one more minute, stirring well, before removing from the heat and allowing it to cool completely. Once the porridge has cooled, transfer it to a large mixing bowl, and add in the garlic, ginger, onion, fish sauce, Gochugaru, soy sauce, and toasted sesame seeds. Mix all together very well, until it combines to create a thin paste. To this bowl, add your daikon radish, julienned carrot, and spring onions, then mix well to coat all the vegetables in spice paste. In another large bowl, take one quarter of the cabbage, and spread the kimchi spice paste between each layer. Once every cabbage leaf has been covered, wrap it around itself and place into your sterilized jar. Repeat with the remaining 3 quarters of your cabbage, placing each into the jar as well. Once the jar is full, place a doubled-up piece of muslin cloth over the opening and secure well with a rubber band or piece of string to allow gasses to escape during fermentation, while keeping fruit flies and small insects out. Place your Kimchi on the bench and allow it to ferment for a few days at ambient room temperature- warmer weather will cause it to ferment faster, while cooler weather will cause it to slow down. Once fermented, it should smell and taste sour, and when you push down on the cabbage leaves, bubbles should rise to the top from underneath. After a few days, you can remove the muslin cloth and replace it with an airtight lid, label your jar, and place it in the refrigerator to slow down the fermentation process. It is a good idea to regularly open the lid (every few days or so) to allow any gasses to escape so that the jar doesn’t explode. It can be enjoyed from this point on, for a healthy dose of gut-friendly probiotics! Kimchi can be stored in the refrigerator for several weeks to months, with its complexity of flavour continuing to develop over time.
Notes:
•Feel free to customise this recipe by adding other seasonally and locally available vegetables such as cucumbers, bean sprouts, bamboo shoots, or bell peppers.
•Adjust the level of spice based on your preference; more Gochugaru can be added for greater heat, and crushed Aleppo peppers or Chili flakes can also be substituted.
•Ensure all utensils and jars used during the fermentation process are clean and sterilised with boiling water to prevent unwanted bacteria from ruining your fermentation.

Adaptogenic Plant-Based Chai
Ingredients for Chai Spice Mix:
•1-2 whole dried Cinnamon sticks (Cinnamomum zeylanicum)
•1 teaspoon dried Black Peppercorns (Piper nigrum)
•2 teaspoons dried Ginger root pieces (Zingiber officinale)
•1/4 of a whole dried Nutmeg— can be finely grated using a microplane
•3 dried Star Anise pod
•6 dried Cloves
•4 dried Cardamom pods
Ingredients for Adaptogenic Oat Milk Chai:
•1 teaspoon ground Chai Spice Mix
•1 teaspoon dried, powdered Siberian Ginseng root (Eleutherococcus senticosus)
•1 teaspoon dried, powdered Astragalus root (Astragalus membranaceous)
•½ teaspoon organic Vanilla Bean extract
•1 teaspoon organic grass-fed Ghee
•1 Cup organic Oat milk (Or plant-based milk of choice)
•1-2 teaspoons organic Coconut Blossom Nectar, Maple Syrup, or Raw Honey
Method:
First, create your Chai Spice mix using the first 7 ingredients listed above, by adding the whole spices to a clean coffee or spice grinder, and pulsing until fine powdered consistency is achieved. Strain out any larger pieces left behind with a fine mesh sieve, and transfer powder to a small jar with an airtight lid. This recipe should make around 7 cups of Chai— and you can double the batch if you like but remember that the more freshly ground your spices are, the more vibrant their flavour and medicinal properties will be. These spices are uplifting and invigorating, help to calm digestive upset, flatulence, and bloating, while also enhancing the distribution and absorption of other herbs and nutrients throughout the body.
Once you have made your spice mix, transfer one teaspoon of it to a small saucepan, along with your Siberian Ginseng and Astragalus powders, Vanilla extract, Ghee, and Oat milk. Give this a good whisk to make sure there are no lumps, and then gently warm over low to medium heat, stirring often to ensure it doesn’t burn. Once there is steam coming off the top, but it has not yet reached a rolling boil— remove from the heat and let stand (covered) for 5-10 minutes to continue steeping. Pour through a fine mesh sieve into your cup and add your sweetener of choice, giving it a final good stir to distribute evenly. Enjoy your energising, immune enhancing, adaptogenic elixir as a healthy replacement for morning coffee without the crash, or in addition to it. This delicious botanical elixir helps the body to adapt and respond to daily stressors in a calm and focused way, improves memory, and supports all the body systems to function optimally.
*Note:
While adaptogens are powerful herbs with numerous benefits, they are generally not recommended during acute illness. Adaptogens are most beneficial when used preventatively to help the body manage chronic stress, as well as tone and nourish various body systems. They work by balancing cortisol levels, supporting the adrenal glands, boosting energy, and enhancing the immune response. However, during acute illness, adaptogens may interfere with the body’s natural healing process. They can potentially overstimulate various systems, which is counterproductive when the body needs to prioritise rest, recovery, and resource conservation. By increasing mental alertness or encouraging physical activity, adaptogens can divert energy away from the healing process, potentially prolonging recovery by interfering with the body’s need for rest and relaxation.
